How do I record?
- Home screen and recording
- Saved videos folder
- Managing takes
- Teleprompter* — only for studios where the teleprompter is included in the package
- Toolbar - Record
- Drawing
- Erase
- Cursor
- Change text to image
- Duplicate tools
- Recommendations before and after shooting
Home screen and recording
Studio recordings are done using the Jalinga Studio software.
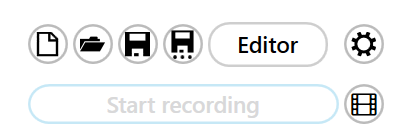
The home screen, which opens when you start the program, is the recording mode.
All the basic operating functions are found in the left menu
Saved videos folder
The “Open Recording Folder” icon opens the folder on the system where the recorded videos are stored. A hard drive is pre-installed to save your videos to the server. When installing the studio, our technician creates a Video folder in the drive and specifies the path to the folder in Settings. Folders are given the same name as the presentation.
Managing takes
After stopping a recording, the program opens the “Managing takes” window, if you enable this function in Settings. It is not enabled by default. You can turn “Managing takes” on in the “Streaming and recording” section in Settings.
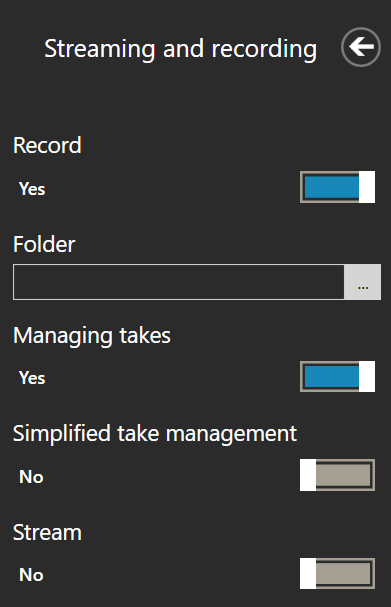
There are two modes for managing takes — simplified and advanced. A take is any video clip that you have recorded.
Simplified take management only allows you to save and delete takes, while advanced take management also allows you to split a video into scenes. An example of a scene could be a particular topic in your presentation. Scenes can be planned out in advance, for video lectures for example, or other videos with structured content.
With advanced management, the numbering will be like this — Presentation 1.1, Presentation 1.2, and when you switch to the next scene, the numbering will change to Presentation 2.1, Presentation 2.2, where the first digit is the scene number and the second digit is the take number.
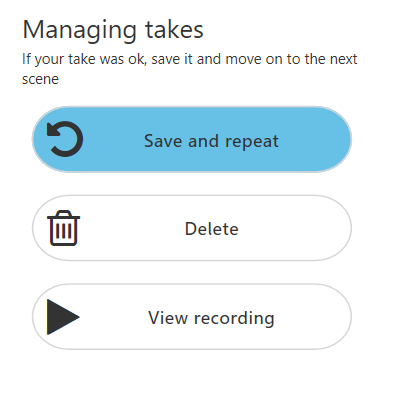
Simplified take management
Save and repeat — saves the recorded video and takes you back to the program’s home screen
Delete — deletes the take and takes you back to the program’s home screen. Don’t worry, the take is not deleted forever, it is moved to the “failed” folder. If you delete a take by mistake, you can restore it by moving it from this folder.
View recording — opens the recorded video in the media player so you can view it straight away. After that, you can return to the program’s home screen.
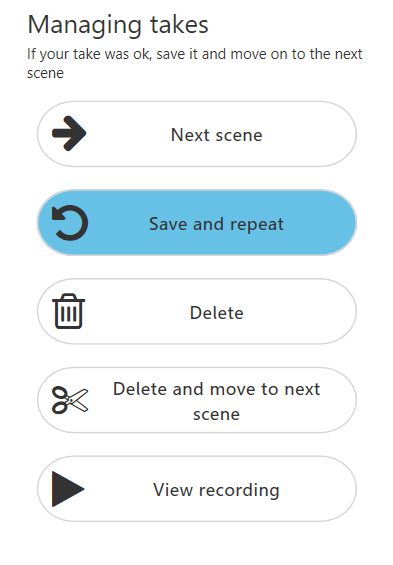
Advanced take management
“Next scene” — saves the previous take (it will be Scene 1 in the numbering order) and switches your recording to Scene 2 and Take 1 (and so on).
“Save and repeat” — saves the take and leaves you with the same scene number, just like delete — the previous take is deleted, and the scene number stays the same.
“Delete and move to next scene” — deletes the take and moves you to the next scene number.
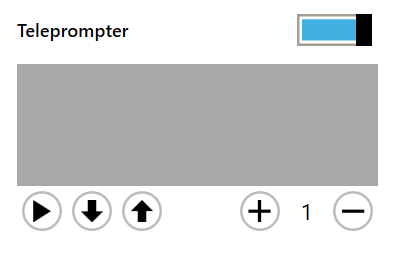
Teleprompter* — only for studios where the teleprompter is included in the package
The slider under the “Start recording” button turns on the teleprompter window. If it is not visible, you need to go to Settings to the Teleprompter section and enable “Use teleprompter”.
In the teleprompter box, you need to insert text from any text editor. The > button starts the teleprompter, and the up and down buttons allow you to move up and down the text correspondingly.
You can also scroll through the teleprompter text using the mouse wheel, or the slider to the side of the window (this is much faster). The up and down buttons are most commonly used if you need to slightly scroll the text up or down. The + and – buttons control the speed at which the text moves. The speed should comfortably match your pace of speech. We recommend practising this before recording.
To make things easier, we made some rules for formatting text. They take into account the fact that when using the teleprompter, certain text formatting features become unnecessary because the teleprompter does not recognize them, or they may confuse you when you are reading from the teleprompter.
• Do not use text formatting (bold, italics etc.)
• Do not use numbering, headings and lists
• Font size and type are not taken into account
• Add pauses to a text using blank lines or the symbols * (asterisk) and ! (exclamation mark)
• Write out abbreviations in full
• Write numbers and dates in words
• Find synonyms to replace words that you stumble over
When interacting with a presentation, add hint words so you know exactly what action you need to do and so the teleprompter text does not scroll too far ahead.
Toolbar - Record
The toolbar is the main element for controlling a presentation. Let’s look at the tools one by one.

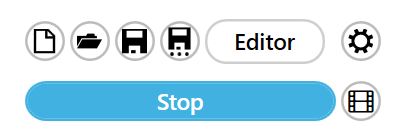
“Record” starts and stops a recording. Using this function, speakers can record by themselves without the need for additional tools. When you press the button, you’ll have 3 seconds to prepare and then the recording will begin. After the recording has started, the record button on the toolbar will change to a stop button.

Drawing
The “Marker” allows you to draw or highlight with a thick semi-transparent line in the color of your choice.

The “Pencil” allows you to draw a thin line in the selected color. The width and color for the pencil and marker can be selected in the Jalinga Settings.

In the toolbar there are 3 colors available for the pencil and marker. When you select one of the colors, you will immediately be able to start writing with the pencil.

If you select a color for the marker, after you have selected the color, you will need to select the marker.
The colors can be changed in Settings in the “Draw” section. In this section, you can also select the width and opacity of the marker. The colors follow the RGB color model. If you do not know the parameters of the color you need, you can use any online color palette, such as https://csscolor.en/
The parameters should be entered accordingly – Red R, Green G, Blue B

When using the marker to write on the board, here are some tips for better sensor sensitivity:
• do not write too fast;
• use a marker with a tip diameter of more than 5mm.
You can write notes on each slide individually. When you switch between slides, the notes you wrote will remain on the previous slide.
Erase
There are several ways to erase what you have written.
The “Eraser” is used when you don’t need to erase a full sentence, but just correct one part. It has a pretty small radius.

The “Bin” is used to delete everything written on a slide in one touch. Please note, this only applies to things written by the marker or the pencil.

If you have a list of several points, and you need to erase one of them, but you don't want to delete everything on the slide, we recommend using the sponge that is attached to the board in your studio.
.
Cursor
The “Cursor” is a tool for working with objects. The cursor helps you to move objects, hide and show them, increase and reduce sizes, click buttons, etc. It performs the same functions as the left mouse button.

Change text to image
“Change text to image” transforms everything you wrote on a slide into an image, so you can move everything on the current slide, copy it to other slides, change the size, or save on a hard disk as a separate file for future recordings.
After using this tool, you will no longer be able to erase the image using the previous methods, but you can hide/show it using the cursor. To delete an object, you’ll need to use the editor – go to presentation editor mode and delete it manually.

Duplicate tools
All tools in the toolbar are duplicated on the studio screen. This means that you can record videos without using the toolbar – if an assistant at the studio computer is able to switch the tools for the speaker when needed. The main screen can also be used to switch between slides.

Recommendations before and after shooting
1. Prepare all the materials for the shoot BEFORE you get to the studio. Make sure you have:
- The text for the teleprompter
- The presentation
2. Rehearse your talk along with the presentation slides.
For speakers who have little experience on camera, the whole process may seem difficult, even if they are experts in their field. Having a good rehearsal will help to reduce the shooting time and make the recording process faster and more productive.
If you plan to record the video in parts, you should make sure you know how to split them before you start shooting.
You shouldn’t split them by the number of slides, and certainly not by sentence or paragraph.
Try to split the presentation up into logical parts: welcome, introduction, module 1 etc.
The switch between takes is noticeable, but it looks organic if the takes are split up logically.
3. Choose comfortable and appropriate clothing.
Choosing the right clothes for a recording will give you confidence and make you feel more relaxed.
It’s important that you feel good when you look at yourself in the studio screens.
We recommend wearing clothing that contrasts with the background – white clothing for a black background, or black clothing for a white background.
Avoid sheer fabrics, large knitted patterns, checks or stripes. Wear comfortable footwear – it won’t be seen in shot, and the filming process can be tiring.


During the recording
1. Record in takes.
We know that every speaker can record material in one take. However, if that’s not possible, we recommend recording in takes. If you don’t manage to record the take in the way you wanted, simply click “Stop” and go back to the beginning of the phrase. You can easily splice the takes together in the edit.
Some people find it easier to record a video in one single take, including any errors and mistakes. This is also an option, but in our experience, we can say that splicing together good takes in the edit is easier to do.
2. Pause at the beginning and end of a take
After pressing “Sart”, pause for 1-2 seconds, and then start to speak.
Your intonation should go up. These few seconds can be cut, but there is no way of getting back speech that has accidentally been missed. The same applies to the end of the recording. Speak until the end of the text and look into the camera, then you can press the “Stop” button. Correspondingly, your intonation should go down towards the end.
3. Change your position during takes
But try not to abruptly change your position and pose between takes.
Choose a comfortable pose in which you will end the take and then start a new take. It’s important to remember where you were standing in the frame in the previous take, how your hair was and where your hands were.